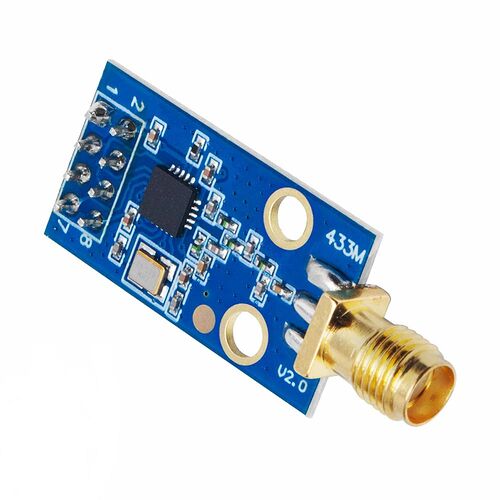
Włączyłem Putty i ustawiłem tak jak na zdjęciach, z tym, że na porcie com6, bo tak mi się zgłasza Wemos.
Na razie w konsoli jest pusto.
To zrestartuj ESP, musi być odzew, bo jeśli nie ma to nie będzie (zakładam brak komunikacji, ale jeśli wiesz że to działa, to oczywiście w logu jest pusto po odpaleniu terminala na już włączonym ESP, póki się ESP nie odezwie, bo to jest przechwytywane na żywo).
Ale skoro pisałeś o D1 mini, to on ma podpięty UART na stałe do mostka USB (=to musi działać jeśli masz prawidłowe sterowniki i wybrałeś właściwy port szeregowy).
Oczyścicie terminal musisz odpalić (Open lub dwuklik na zapisanej konfiguracji - tak na przyszłość - w liście połączeń warto sobie zapisać “gotowca”).
Tak właściwie ma to tylko jeden cel - możliwość podglądania logów nieskończenie długo (więc urządzanie komputer czy tam jakiś stary telefon musi mieć wyłączone usypianie i zapewnione stałe zasilanie).
Ok na razie tylko tyle
[D][sntp:077]: Synchronized time: 2023-05-05 18:46:46
[D][main:195]: Synchronized sntp clock
[D][sntp:077]: Synchronized time: 2023-05-05 19:01:46
[D][main:195]: Synchronized sntp clock
[D][sntp:077]: Synchronized time: 2023-05-05 19:16:46
[D][main:195]: Synchronized sntp clock
HI
I’m sorry for my english.
I have the same meter.
Where can I find the documentation to be able to read the data.
Is there a tutorial?
I can’t understand how it works.
for example I can’t find the code for the Wemos D1 Mini
can you help me?
thanks
You have to start with any ESPHome “empty” firmware (generated by the wizard) or preflashed firmware for ESP8266 using
https://web.esphome.io/
and adopted to ESPHome dashboard (IDE)
The solution is fully documented in its repository.
Wemos D1 Mini itself is definitely not enough, you also need CC1101 in a version made for 868MHz
Other resources (in Polish):
you can check that case => Wmbusmeter Licznik wody Sensus iPerl
Because I also have a lot problems with that water sensor but solution was to use some think like this:
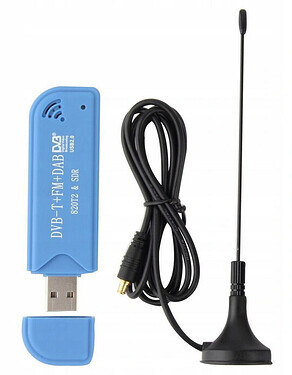
connected to USB port and make some easy (right now ease…) configuration.
Last month I`m doing this some of my collegues and that takes 10 minutes.
and most important think - cost around 50zł ![]()
Witam, mam podobny problem. Mam też iPerl meric. U mnie działa czytanie za pomocą klucza USB RTL, ale chciałbym przełączyć się na esp32 z modułem CC1101. Jednak nie mogę się rozstać. Teraz zdałem sobie sprawę, że nie wiem, czy wodomierz nadawał na częstotliwości 433, czy 868 MHz. Nie wiesz jak mogę się tego dowiedzieć?
Pokaż konfigurację rtl_433
Z tego co wiem to działał na 433MHz. Dzięki temu od wersji 2.4.4 mojego komponentu można wybrać częstotliwość i odczytać ten licznik.
Hi, if so, how does it work?
I find a tutorial somewhere.
In general, if I can, I wouldn’t like to invent anything new. If something already works I prefer it.
I’m getting lazy.
Thanks in advance
@szopen Thank you
I can’t find a connection diagram between esp8266 and c1101
Thanks in advance
It depends on used developer board - so there is no “one and only” working configuration, but you should use default secondary SPI interface and other pins not interlally connected to other components on the PCB.
@_Szczepan corrected me - CC1101 for this particular meter should be 433MHz version
Thank you
I’m not that expert and I don’t think I understand you
Seems so - at least Ondra’s one.
Please remember that for 433MHz Tx and Rx frequencies are different. So everytime we talked about 433Mhz it is not exact 433MHz (meter to cc1101) ![]() Freq should be set to 434.475MHz
Freq should be set to 434.475MHz
I have a CC1101 which allows you to use multiple frequencies.
But I didn’t understand how I can set the 433MHZ frequency
I searched a bit on Google but couldn’t find anything clear.
Should I get a CC1101 specific for 433MHZ?
Unbelievable, simply impossible, but I need lots of time to explain…
CC1101 is universal, but module with antena circuit NOT
If you were in one thread and not in many, I would have everything at hand…
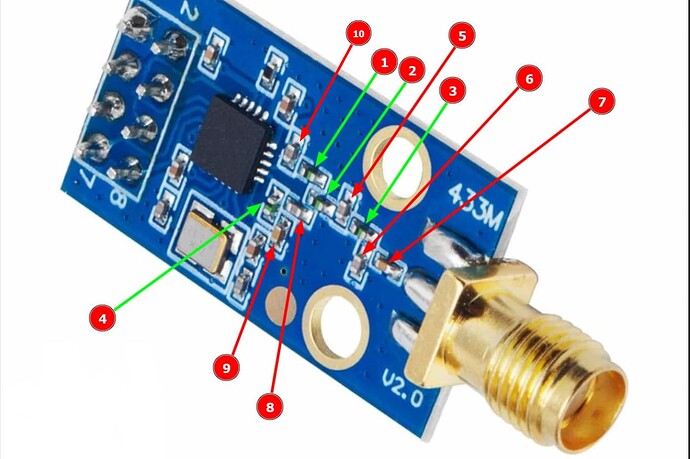
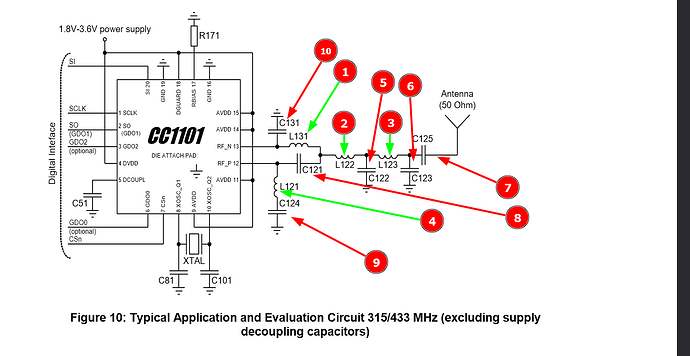
it is for sure 433MHz version
coils indicated by green arrows, capacitors = red arrows
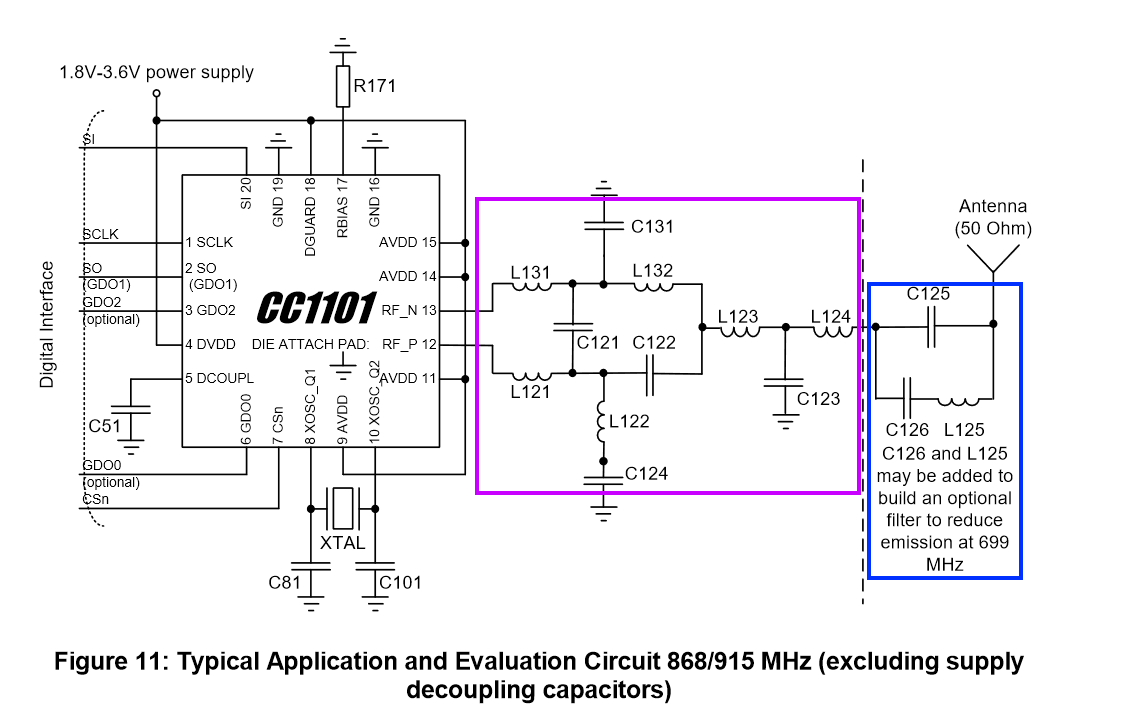
module version for sub 1GHz band has really different filters section
in a purple rectangle is a must-have set and in blue is optional (but I didnt found it in Chinese modules).
Apart from all this, their frequency is printed on the modules, so they are easy to distinguish - 433M means module is dedicated to 433MHz band.
And the last sentence - why?
The need to use filters in the antenna path results from legal conditions present in virtually every corner of the world.
Ask @_Szczepan
Your module has a frequency of 433MHz, but I’m not actually sure which (433MHz or 868MHz) you really need.
external_components:
  - source: github://SzczepanLeon/esphome-components@main
    refresh: 0d
    components: [ wmbus ]

wmbus:
  frequency: 434.475
  # frequency: 868.950
  mosi_pin: MY_PIN_A
  miso_pin: MY_PIN_B
  clk_pin:  MY_PIN_C
  cs_pin:   MY_PIN_D
  gdo0_pin: MY_PIN_E
  gdo2_pin: MY_PIN_F
  led_pin:
    number: MY_PIN_G
